
Cursed Antaroth Abyss
Cursed Antaroth Abyss is a one boss dungeon. The boss comes from the previous Dungeon, Antaross Abyss hard mode. Many mechanics and attacks are similar to the Hard Mode Boss. To better understand this guide, and for a better experience, I recommend mastering the hard mode first, there shouldn’t be any complications or issues in doing mechanics, then the cursed mode will already be much easier!
Basic Attacks
Under basic attacks is meant, attacks which aren’t a mechanic, regular attacks which the boss is spamming without cooldown (probably because the boss is using full Cdr stigmas) The basic attacks are almost all 1:1 as in hardmode, just the speed and damage improved.
Every AoE Spin applies heavy bleed debuff, every stun, and laser applies mana stacks. All stuns / debuffs are cleanseable, and should be instant cleansed if possible to avoid dying.

Starting the boss makes him cast “pushback”, the same as in hardmode, just much more damage. Should be iframed to prevent damage if too low gear. Healers use Kaias to avoid pushback and death.

Those are the basic attacks which the boss will be casting most of the time.
2x Swing, 1x Swing, left to right swings.
All blockable, iframeable

2x Swing into back Stun. Healers have to cleanse the people who got stunned, or else the boss casts his AoE spin. Iframeable only.
Being hit by stun adds one mana stack

Random front- back Stun attack. The boss will randomly cast this attack, beware of it. Iframeable only, healers have to cleanse to avoid the AoE spin.
Being hit by stun adds one mana stack

The boss will randomly target someone with 2nd aggro, aiming at the person and going to shoot a blue or purple laser. There are 2 Variations of this attack, one where he instantly shoots it, and at the 2nd one he baits with his swing and then shoots it.
Being hit by the laser adds one mana stack. Iframeable

The boss targets a player with 2nd aggro, jumps to the player and stuns anyone nearby around the boss. Healers have to cleans, to avoid the AoE Spin. Iframeable only
If beeing hit by the attack, you gain one mana stack

The boss teleports randomly backwards and casts either spin aoe, or else front + back stun.
Tank bait
We call this attack “tank bait / tank buster” since it’s meant to kill the tank if the attack isn’t played properly, and if the healers won’t engage quick results to death. The cursed Antaross boss has 2 tank baits / busters.
There are 2 Variations. The boss is attacking the tank as usual and stops to attack, he holds still, this is the moment you should know the tank bait / buster is incoming.

Now there are 2 variations of what can happen, the boss stands still for just a moment, casts his attack. If being hit by this attack you get medium damage + heavy bleed debuff and one mana stuck.
The 2nd variation of this attack is, the tank stands still, but takes more time to cast his attack, if hit, the slower version makes you fly away, gain one mana stack debuff and heavy bleed, remember that once your in the fly animation as well as on the ground you won’t be possible to get up or move. Priests can use pull as in gls hm 2nd boss / Forbidden Arena Slayer boss. The first variation is perfect blockable (Perfect Defensive) and iframable The 2nd variation is iframeable only.
Blue circle patterns
This attack remains the same as in hardmode.
Just the damage changes, iframeable only

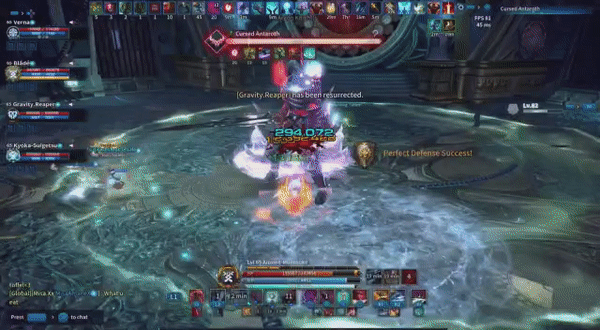
Purple Mana Stacks
Purple mana stacks are those stacks under the boss HP bar (Picture) Everytime the boss casts or uses his “Purple Orb” he will gain one of those stacks.

He gains those at the Tank bait attack if the Orb he swings first is Purple, and if the laser he shoots is Purple. Everytime he uses any of those attacks, he gains stacks till the 4th stack. At the 4th stack, the stacks under his hp bar are gone, and the boss casts his “Purple Spin”. This spin is instant casted or slightly delayed, or even casted after mechanics, so once you see the stacks disappearing and he still hasn’t cast the Spin, be aware of it.

Here the boss does the tank bait, holding a purple orb to bait, the 3 stacks disappear from the Boss hp bar and he casts his Purple spin.
If hit, applies heavy bleed effect, mana stack + purple spin bleeding (damage over time)
Mana drain
If being hit by most of the attacks from the boss which aren’t combined with certain mechanics, you will gain mana stacks.
As mentioned before in the guide, you get those stacks very easily.
Every stack you gain will increase the damage once the boss casts:
“Dispersing collected Mana”
At 4/5 stacks you will receive high damage / die.
After the boss casts the attack, everyone gets a mana draining debuff, and has to be cleansed.

Red Magic
Red Magic (nm/hm/cursed till 60%)
1.Stab
Line front+back attack, medium damage + Mana Burst Stack
Blockable, iframeable, dodgeable
2.Spin AoE
AoE spin, medium damage, applies heavy bleed effect
Iframeable, cleans-able
3.Half room AoE
Half AoE, medium damage
Dodgeable only
4.Donuts
100% HP destroyed (HM only)
Dodgeable only
After the stab attack you receive information about:
Half room AoE
+
Donuts
In this guide I will use the stab attack information mainly, since it’s the easiest to understand and gives you enough time to position yourself correctly for the donuts.
(There are a few other variations of how to understand the Half room AoE + Donuts but I personally believe those are just more confusing)
Once the boss hits his stab attack, he will hold his sword either on the left, or right side.
Depending on which side he holds the sword, you will know
where to position yourself the incoming Half arena AoE + Donuts.

If the sword lays on the right side after the stab attack
(From the back, if the sword lays on the left side)
The Half Arena AoE hit will be on the right side
(From the back left side)
The Donuts will appear from the inside, to the outside.

If the sword lays on the left side after the stab attack
(From the back, if the sword lays on the right side)
The Half Arena AoE hit will be on the left side
(From the back right side)
The Donuts will appear from the outside, to the inside.
Out of this, we understand, the Half room AoE is always on the side the sword is being held.
This is the most important part besides being able to dodge the donuts of red magic, once you understand this, red magic will already seem much easier.
Donuts, but not to eat.
Those donuts which either appear from the inside to the outside, or from the outside to the inside from the boss within a range of 30 meters, are destroying 100% of ur hp, means if your applying any type of shield, you won’t be killed from this attack (Hm only)
To dodge these donuts you have to get a good timing with your class, but every class has it own ways to dodge it, I personally like to use skills to dodge it and not just the iframe roll, besides that most dodge skills are faster than the roll too, allowing us to keep dps up while doing the Mechanic.
Purple Magic 60%
At 60% the boss now casts an improved version of red magic, purple magic. The boss now glows up purple instead of red.
The factors of red magic remain the same: Stab AoE Spin Half room AoE Donuts The only thing which changes specially are the donuts. The Donuts do not appear as in red magic from the inside to the outside, or from the outside to the inside. But from now on in patterns. Within a range of 30 meters there will be 5 layers of Donuts. There are 2 different patterns which can now appear, depending on the stab attack, if left/right. The Donuts are dodgeable only, they hit for a million damage. Donut patterns are always 3 hits.
After the stab attack, if the sword lays on the right side (From back left) The boss Donuts pattern will be: Out, in, out. If the sword lays on the left side (From back right side) The boss Donuts pattern will be: In, in, out. Now what does out/in mean? As you can see on the picture there are different layers of Donuts areas, in which u can stand after each donut hit. I am referring to the most inner Donuts attacks, which are the easiest to dodge. Once you get more used to the attack, you should also know the outer pattern.


Green are the safe zones, white are the donut hits, this shows in, in, out.


Green are the safe zones, white are the donut hits, this shows out, in, out.
Those images are not made by me, I sadly also have no clue who made them, but thank you bro.
Ritual 70%
Ritual (Orb Mechanic) In comparison to hardmode, here everything did change. Antonia became less racist by not having to destroy the black orb if white and the white orb if black. Now we got red and blue. The boss teleports in the middle of the arena and starts the ritual, before he actually starts to do his naruto hand signs, you will see his sword glowing, in either red or blue, after the glow the boss now splits the arena ground, half of the arena into blue, and the other half to red within a range of 30 metres from the boss. Red and blue orbs appear, depending on how many red or blue orbs are left after the Mechanic, the boss now gets Speed + Damage increase (Red) / Endurance increase (Blue)
While the boss is standing in the middle, his sword is either glowing up blue or red. This is important to know due to the Endurance increase. From the boss’s sword, the colour in which the sword glows in, on the opposite side will be the half arena colour hit.
By this, you’re able to choose if you’re either red / blue, moving to the next Mechanic, orbs. After getting your debuff colour, you now have to destroy the orb with the same colour as your debuff is. Important for healers is, as in hardmode you have to dispel the boss, to decrease the casting speed of the mechanic.
Means red destroys red and blue destroys blue. The timing remains the same as in hardmode, once the orange letters on the outside part of the ritual circle hit together the damage from the boss hits.
Also Important to know is that there are only 4 orbs of each colour. The last important information for this mechanic are the left orbs. The remaining orbs which
didn’t get destroyed will now add decrease Speed + Damage increase (Red) / Endurance increase (Blue)
Our goal is to always remove the blue orbs, since those increase the endurance.. Since there are only 4 blue orbs, one person has to focus to always take the red orb.
If you do not want to have any orb left, choose one person which has ranged attacks, or can move around fast, that person now takes as only one the opposite colour, removing all of the 3 orbs, saving on orb for himself/herself. The other 4 people are going to take the opposite colour of the one solo remover person

Red glowing Sword, on the sword side is the blue debuff, on the opposite side from the sword is the red debuff.

Blue glowing Sword, on the sword side is the red debuff, on the opposite side from the sword is the blue debuff.
Cage 40%
In progress to find a solution, please contact me if you have any information/provements if the Mechanic is working correctly.
The Mechanic doesn’t work as the PC one, we are meant to remove the stacks from the boss but we get additionally a self colour debuff.
I will update the guide once there’s a clear answer to this Mechanic, till that:
Your able to skip the cage mechanic in different variations:
Lancer can block the incoming damage
Healers can self res
If people stand in the middle of the cage and dead zone, you also do not get any colour debuff, remain on white to skip all hits.
Timer 50%, Clones
At 50% the boss timer will now begin. As in hardmode just in cursed mode we now have 20 mins time to enjoy the boss. At the same time the boss will now cast his attacks faster and enter his rage phase. While the boss activates his buffs, he also teleports into the middle, summoning 2 clones.
It is basically the same mechanic as in hardmode, just reversed.

Timer debuff, 20mins.

If the boss teleports to the abyss portal, he will be now casting with his clones the AoE spins, aren’t at the same time being cast by all clones at the same time and the clones can spawn extremely near or far away from each other.
Spins, if being hit you will receive heavy bleed effect, heavy damage and one mana stack.

If the main boss teleports to the door/entrance of the arena, he now will be doing blue magic / blue laser. The only difference is that out of each clone now 3 lasers will be shot, as a pump gun, spreading. To avoid hitting teammates you can stand outside of the arena, so that the clones + boss face the outside of the arena.
If the boss teleports to the Abyss portal, he will now be doing spins, and his clones will too. Both attacks are iframeable.
About the author:
Hello friends, I welcome you to my guide, written by Aizome Munesuke, guildmaster of Souru Sosaeti!
My goal with my guides is to help players understand Tera related information easier and improve their game experience!
This guide is made for you, an honour for me, that you’re reading it!
Please forgive my mistakes, I will do my best! For improvements or Questions, please contact me on discord: Aizome#5555 or [email protected]